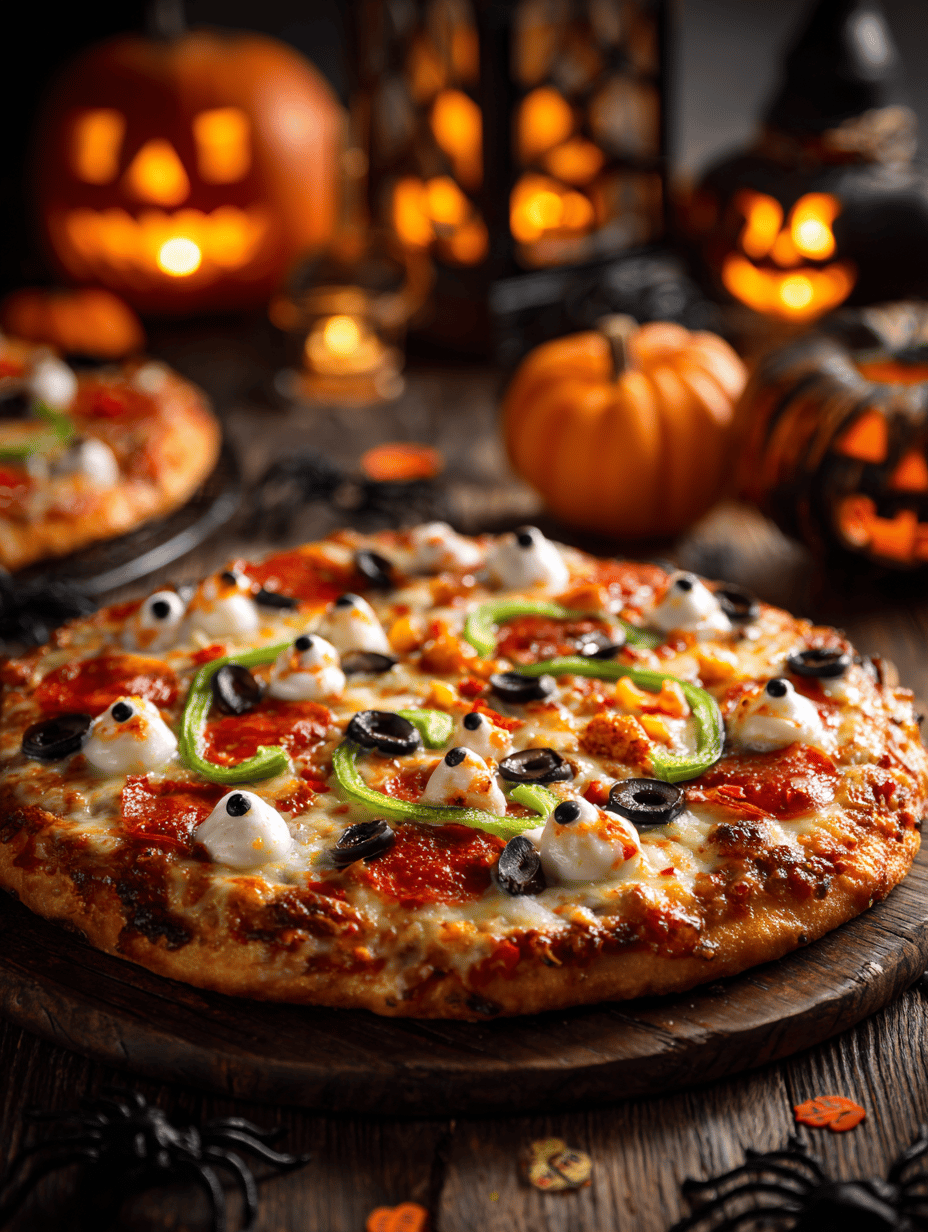
Halloween is the one time I love going all out with food, especially when I can combine the playful with the savory. This Halloween pizza is my way to turn a simple bake into a mini spectacle—no fancy tricks, just a lot of fun. It’s about the bit of chaos in the kitchen, the smell of melting cheese, and crafting something a little spooky, a little silly.
Why this pizza keeps calling me back
It’s a straightforward way to bring fun into the kitchen, especially during October. The combination of cheesy, crispy, and colorful toppings always surprises me—no two pizzas are alike. Plus, it’s a great excuse to get a little messy, play with shapes, and enjoy the smells of baking bread and melting cheese. It’s imperfect, chaotic, and always delicious.
Spooky ingredients and how they play their part
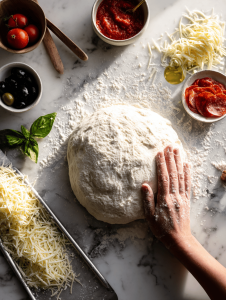
- Pizza dough: The base, needs to be thin and slightly uneven for crusty edges.
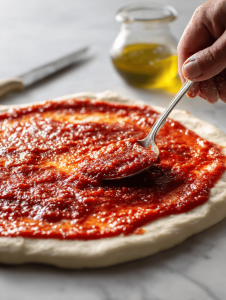
- Tomato sauce: Gives that vibrant, tangy foundation—use a good quality or make your own.
- Mozzarella cheese: Oozy, melty comfort, preferably fresh for stretch and flavor.
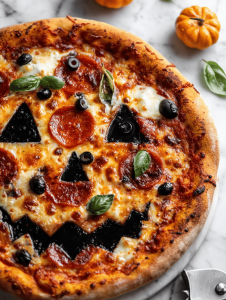
- Black olives: Perfect for spooky eyes or mouths, with a smoky punch.
- Bell peppers or pepperoni: Add color and texture—choose your favorites for creative shapes.
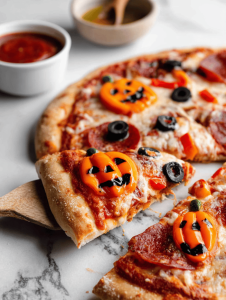
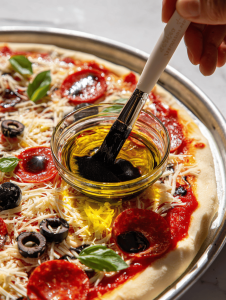
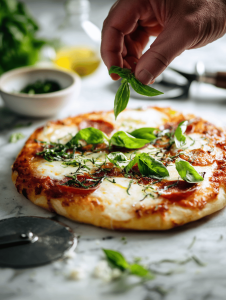
- Herbs and chili oil: Finish with a fresh burst or a spicy shimmer to elevate the look and flavor.
Tools of the spooky trade
- Rolling pin: To flatten the dough evenly, giving it a rustic look.
- Baking stone or sheet: For a crisp, even bake.
- Pizza cutter or sharp knife: To cut shapes or slices cleanly.
- Oven thermometer: Ensure accurate temperature for perfect baking.
Step-by-step guide to crafting your Halloween themed pizza
Step 1: Preheat your oven to 220°C (430°F).
Step 2: Roll out your pizza dough on a floured surface until thin and slightly uneven for that rustic look.
Step 3: Spread a thin layer of tomato sauce, leaving a small border around the edges.
Step 4: Sprinkle shredded mozzarella generously over the sauce.
Step 5: Create spooky shapes or faces with sliced black olives, pepperoni, or bell peppers.
Step 6: Bake the pizza on a preheated baking stone or baking sheet for 12-15 minutes, until the crust is golden and cheese bubbly.
Step 7: Remove from oven, let sit for 5 minutes to set.
Step 8: Add finishing touches like chopped herbs or a drizzle of chili oil for extra flair.
Key checkpoints to perfect your spooky pie
- Crust should be golden and crisp around the edges.
- Cheese should be bubbly and slightly browned in spots.
- Toppings should be cooked through and visually appealing.
- Oven temperature must be accurate for perfect baking.
Avoid these common Halloween pizza pitfalls
- Burned edges from oven overheating.? Use a timer to prevent over-baking, which can dry out the crust.
- Toppings turning soggy or greasy.? Keep toppings light to avoid sogginess.
- Uneven baking or undercooked cheese.? Check oven temperature with a thermometer.
- Pizza sticking to the baking surface.? Use parchment paper if sticking occurs.
Halloween Spooky Pizza
Ingredients
Equipment
Method
- Preheat your oven to 220°C (430°F), ensuring it’s fully heated for a crispy crust.

- Lightly flour a surface and roll out your pizza dough into a thin, rustic circle, aiming for slightly uneven edges for charm.
- Spread a thin layer of tomato sauce evenly over the dough, leaving a small border around the edges for a crust.
- Sprinkle the shredded mozzarella generously over the sauce, covering the entire surface for gooey, bubbly cheese.

- Arrange black olives into spooky eyes or mouths, and place sliced bell peppers or pepperoni to create faces or fun shapes.
- Transfer the assembled pizza onto a preheated baking sheet or stone, then bake for 12-15 minutes until the crust is golden and cheese is bubbling and slightly browned.
- Remove the pizza from the oven and let it sit for 5 minutes, allowing the cheese to set and flavors to meld.
- Finish by drizzling with herbs and chili oil for a burst of flavor and a spooky shimmer.
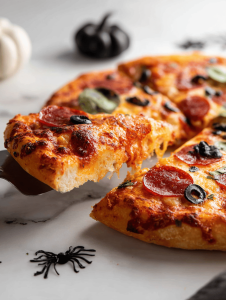
- Slice the pizza into pieces, revealing the vibrant, festive toppings and crispy edges, then serve and enjoy your spooky creation!

Hi, I’m Hannah Reynolds, the heart behind Seasoning Therapist. I believe food can comfort, restore, and gently reset us after a long day. I started Seasoning Therapist with one simple idea in mind: cooking is not just about feeding the body, it is about caring for the mind too. The right seasoning can change the mood of a dish, and sometimes even the mood of the person eating it. This blog is where I combine my love for thoughtful cooking with my belief that the kitchen can be a place of healing.
